
Garage Kits were essentially resin castings of sculptures created and molded in the garages or basements of talented fans of Science Fiction and Horror films. However, in recent years Garage Kits have gone from being an interesting modeling phenomenon to a full-fledged industry with companies like Horizon, Screamin' and Geometric producing an astounding array of subjects in resin and vinyl. Today, the term Garage Kit encompasses everything from high-quality kits from large manufacturers to the individually produced, very limited edition resin kits from the guy down the street. Often it will be the individual producer that provides the more obscure and interesting characters.
I'll be covering the pitfalls and pleasures of those kits produced by amateurs because of their interest in their subjects, rather than for the money they can make. Although the accuracy or quality of these kits may be slightly lacking, the challenge and anticipation of crafting that creature that haunted your childhood dreams can go a long way in overcoming these distractions. Of course, this will be a "worst case scenario" with many different problems cropping up in one kit. Most kits are not quite this challenging, but it's best to know everything you might face and be prepared to correct it.
 |
|
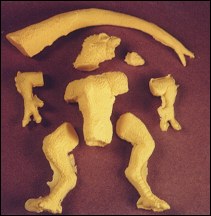
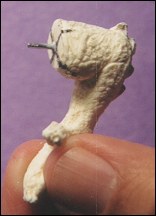
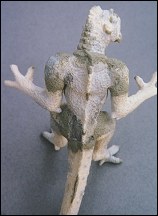
1A. Right out of the box. These are all the parts for the resin Ymir as they came. Note the flash on several of the parts. Depending upon the quality of the resin used for casting, it can be brittle, so handle it with care. |
 |
|
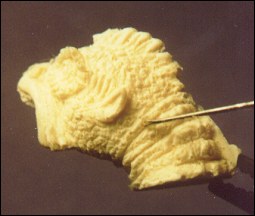
1B. Many flaws show up as bubbles and pinholes which are caused by air bubbles trapped n the resin during the curing process. Some flaws can also be caused by a casting made from a mold that is deterioration. |
 |
|
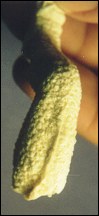
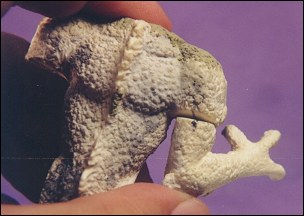
1C. Heavy seam lines that occur on textured areas must be removed carefully in order to preserve the surface texture. |
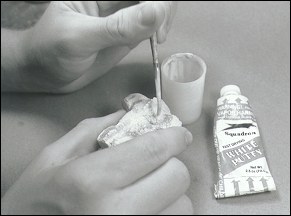
Another problem that plagues resin cast garage kits is pinholes. Pinholes are caused by air bubbles trapped in the resin during the casting process. Depending upon the quality of the casting and the resin used, there can be an apparently overwhelming number of pinholes to be filled in a given kit. A favorite method of filling them is to use drops of gap filling super glue. A simple applicator can be made with a sewing needle and a piece of dowel for a handle. Using wire cutters, snip the needle's eye in half (be sure to use eye protection since bits of needle will be flying) and glue the sharp end of the needle into a small hole drilled into a 1/4" piece of dowel. You will have a "U" shaped applicator that will pick up tiny drops of super glue and deposit them exactly where you want them. Because the glue hardens after a couple of applications, the needle eye needs to be scraped clean frequently. This method works best where there are only a few, larger pinholes to be filled. In a case where there are many small holes, I prefer to use Squadron White modeling putty that has been diluted 50/50 with lacquer thinner. By placing a bit of putty into a 35mm film container and adding lacquer thinner in small amounts, you can reduce the putty to a batter-like consistency and apply it with a brush. Using the thinned putty can cover larger areas of small flaws quickly. Since the putty is thinned, it tends to flow into the flaws and it doesn't clog detail as much as using undiluted putty. You can even smooth out the putty by lightly brushing over it with clear lacquer thinner, but be careful, lacquer thinner can affect the plastic. Often, if the pinholes are quite small, a good coat of primer will cover them nicely.
 |
|
2A. Gap-filling super glue is applied to larger holes using a needle eye applicator. |
 |
|
2B. An alternative method of hole filling, using Squadron putty, thinned 50% with lacquer thinner and applied with a brush. This covers larger areas of small flaws and doesn't obscure the detail. |
 |
|
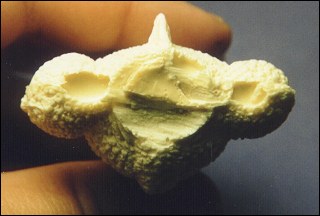
2C. Often, large areas can be lost during casting due to air pockets in the mold. |
 |
|
2D. Milliput is very useful in restoring lost areas and rebuilding details. |
 |
|
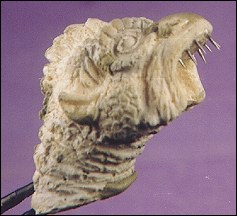
2E. Smaller details, such as claws and teeth can be lost in casting as well. |
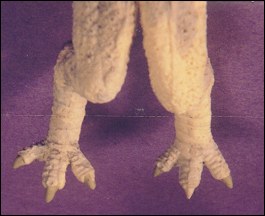 |
| 2F. Claws are replaced with Milliput. |
 |
|
2G. Missing teeth have been replaced with the tips of straight pins. |
Air trapped in a resin casting can cause other problems that don't become visible until you begin to sand rough areas. Bubbles that were below the surface of the resin as it hardened cause a honeycomb effect beneath the skin of your model. Sanding can often reveal these flaws which are easily repaired with thinned putty. Many times you can spot these problem areas before sanding by holding parts up in front of a bright light and looking for thin spots. If the depth of the flaw is too great, you can clean out the honeycomb with a motor tool and fill the resulting hole with Milliput A+B epoxy putty. Using Milliput will also give you a chance to resculpt any surface detail that was lost.
Reference materials play an important part in this pre-assembly stage as well. Although most garage kits build up into good representations of their subjects, there are often some details missing. If complete or at least near complete accuracy is important to you, then back issues of Science Fiction and Monster movie magazines will become an important part of your modeling reference library.
 |
|
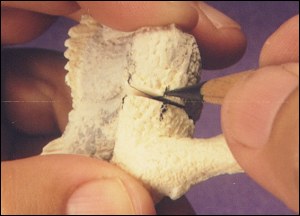
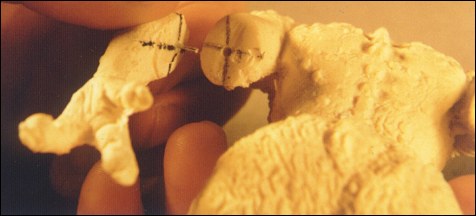
3A. Draw an "X" on the mating surface part to be joined to determine the center of the surface. Drill locating hole for pin at the center of the "X". |
 |
|
3B. Holding the part in place, use the overlapping of the "X" to mark corresponding points on the second part. Use these points to make a duplicate "X" on the second part. |
 |
|
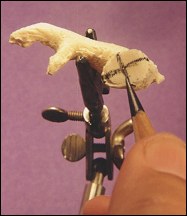
3C. Super glue the pin, in this case a section of a paper clip, into the hole in the center of the "X". |
 |
| 3D. Locate the pin in the hold drilled in the mating part. |
 |
|
3E. Even after sanding and shaping, gaps can remain between assembled parts. |
Since most mating surfaces are smooth and without male/female locators, pinning parts together for strength is another important part of assembly. The trick to pinning accurately is finding the center of both parts in order to locate the pins. After you have shaped both mating surfaces so they match up to your satisfaction, draw an "X" on the mating surface of one of the parts. Be sure that the "X" overlaps the mating surface so you can see its outer legs when the parts are placed together. When you place the two parts together, mark the location of the legs on the second part. Now you have reference markings to make a second "X" on the mating surface of the that part. When you drill holes at the center of the two "Xs", the holes should line up with each other. Using super glue, affix a small piece of wire (a piece of paper clip works well here) into one hole. After it is dry and secure, test fit again before finally gluing the part in place.
Of course, super glue is an absolute necessity for assembling any resin kit, but 5 minute epoxy can come in handy for attaching parts that still have gaps even after all the sanding and shaping is done. The epoxy helps to fill the gaps from within and provides a strong joint. Any remaining gaps can be handled with gap filling super glue or model putty. However if the surface you're filling needs detailing to match surrounding areas, Milliput Epoxy Putty becomes indispensable. As the two-part putty sets up, you can detail it and blend the edges into a seamless surface. It also comes in handy for replacing details that have been lost in casting or filling the larger holes caused by large bubbles in the resin. Milliput is very user friendly, it is easily worked and smoothed with water and it holds detail well.
| |
|
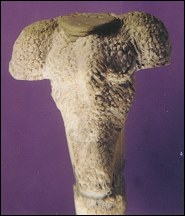
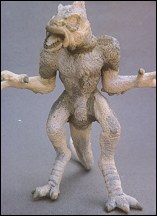
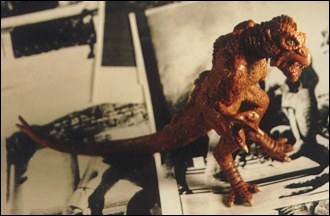
4A,4B. Front and back views of assembled Ymir show areas where Milliput was used to fill gaps and replace lost detail. | |
Naturally, all these problems won't appear in every kit and as casting materials and techniques improve, so will the quality of these small-run kits. Once you've assembled your garage kit, you're ready to move on to the most rewarding part of the process, the painting.
 |
|
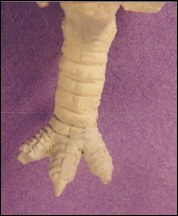
4C. The finished, painted creature standing with reference material xeroxed from books and magazines. Reference material is important to restoring lost details and assuring the accuracy of the final piece. |
 |
|
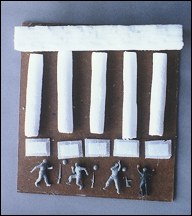
5A. The elements of a simple diorama. Styrofoam blocks, shaped into columns with sand paper will be covered with plaster to duplicate a stone surface. Airfix multi-pose soldiers used in the scene help provide scale to the creature and add detail to the base. |
 |
|
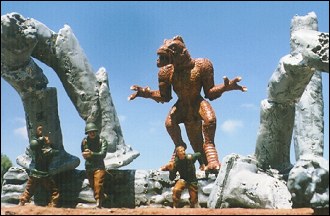
5B. The final piece based on a scene from the movie 20,000,000 Miles To Earth where the Ymir smashes the pillars in the Temple of Saturn in Rome during a confrontation with soldiers. |
If you're ready to take the plunge into the world of garage kits, you are now prepared to take your Science Fiction and Horror dreams and nightmares and build them into a reality.
The Gremlins in the Garage webzine is a production of Firefly Design. If you have any questions or comments please get in touch.
Copyright © 1994-1997 Firefly Design.